Reverse Engineering the Sinar .IA Raw File Format
I reverse engineered the raw format for Sinar emotion digital backs, and created a python GUI tool to convert them to DNGs.

TLDR:
I reverse engineered the raw format for Sinar emotion digital backs, and created a python GUI tool to convert them to DNGs:
https://github.com/mgolub2/IAtoDNG/releases/download/v0.2.1/IAtoDNG-0.2.1.dmg
https://github.com/mgolub2/IAtoDNG/releases/download/v0.2.1/IAtoDNG-0.2.1.msi
Probably I will open source the command line + GUI app as well at some point.
Update: Open Source as of 10/16/2022: https://github.com/mgolub2/IAtoDNG
Okay, So Why Though?
One of the more unique camera manufacturers, Sinar has been in business since 1948. Allegedly, this name stands for "Still, Industrial, Nature, Architectural and Reproduction photography". Though they came up with that in 2010, so the original Swiss founders back in 1948 probably were not thinking of that. Sinar has been producing digital backs since 1998 with the introduction of the Sinarback - see http://www.epi-centre.com/reports/9903cs.html for more info/history!
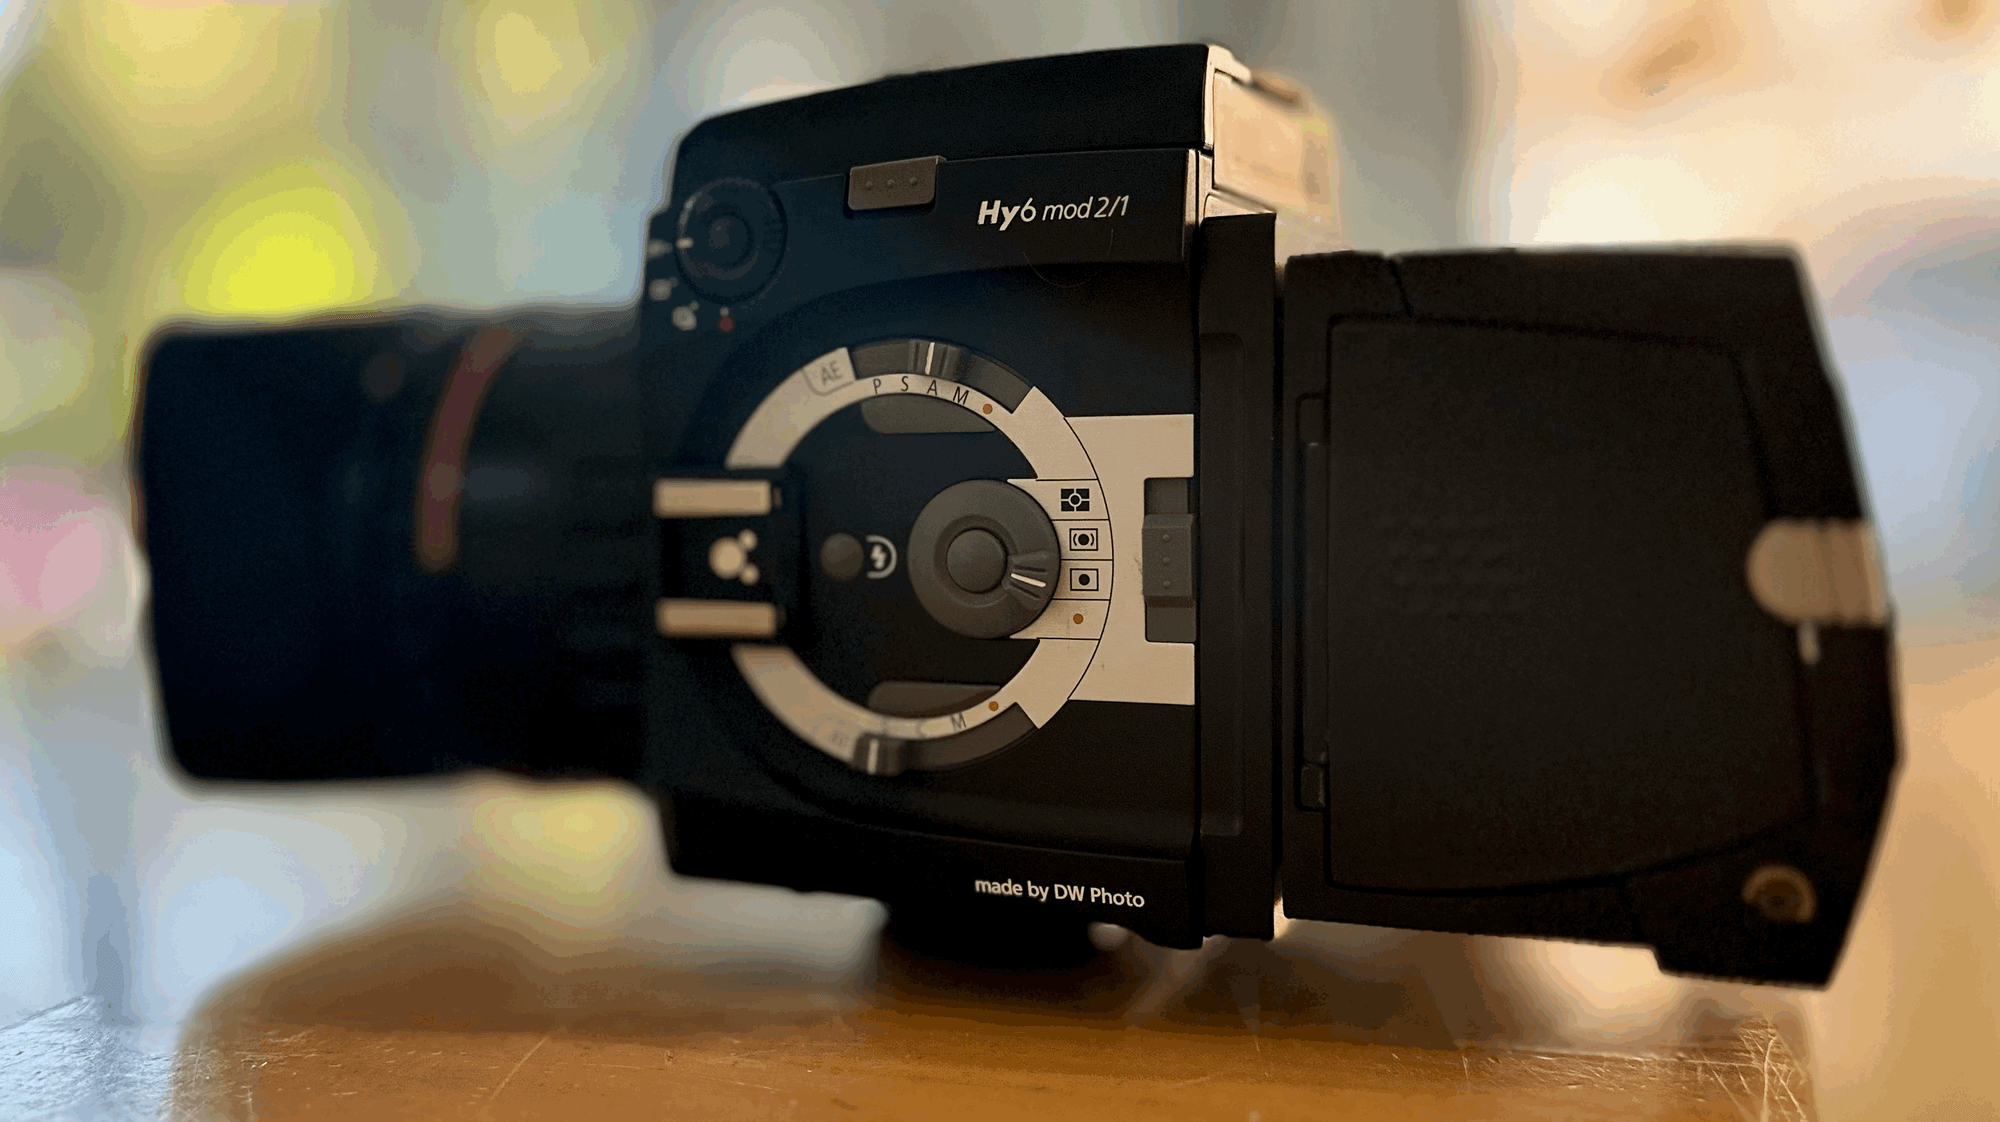
One common theme about Sinar backs, and the reason why a have a few, is that nearly all of them are designed with the ability to swap the camera mount for a different manufacurers camera body. This lets you use the same digital back on everything from a Mamiya 645 Pro (or AFD too!) to a DW-Photo Hy6 Mod 2/1:

The downside of course is that most of the older Sinar Digital backs use unqiue and proprietary software to process their raw files into usable images. For the emotion 22 back featured in this article, the last piece of software to support it fully was CapureShop 6.1.2, which is 32 bit and Mac only, so good luck running it on a modern Mac. Sinar also had other software that supported the back, eXposure, which is also 32 bit and Mac only. Finally, there was the excellent emotionDNG tool freeware that converted Sinar .IA raw files to DNGs: http://www.brumbaer.de/Tools/Brumbaer_Tools.html. For while, I was using UTM/QEMU to host an emulated x86 MacOS on my M1Max Macbook to run emotionDNG, but this was really too annoying (for me) to be usable.
In theory, Sinar CaptureFlow is the latest software from Sinar for their digital backs, supporting the Leica S3 based S30|45 digital back. The emotion backs are listed as supported but for the life of me, when I looked into this almost a year ago I could only get it to load the thumbnail data from the image, not the actual raw itself, which was pretty odd. Sinar IA files are also supported by libraw:
void LibRaw::parse_sinar_ia()
{
  int entries, off;
  char str[8], *cp;

  order = 0x4949;
  fseek(ifp, 4, SEEK_SET);
  entries = get4();
  if (entries < 1 || entries > 8192)
    return;
  fseek(ifp, get4(), SEEK_SET);
  while (entries--)
  {
    off = get4();
    get4();
    fread(str, 8, 1, ifp);
    str[7] = 0;
    if (!strcmp(str, "META"))
      meta_offset = off;
    if (!strcmp(str, "THUMB"))
      thumb_offset = off;
    if (!strcmp(str, "RAW0"))
      data_offset = off;
  }
  fseek(ifp, meta_offset + 20, SEEK_SET);
  fread(make, 64, 1, ifp);
  make[63] = 0;
  if ((cp = strchr(make, ' ')))
  {
    strcpy(model, cp + 1);
    *cp = 0;
  }
  raw_width = get2();
  raw_height = get2();
  load_raw = &LibRaw::unpacked_load_raw;
  thumb_width = (get4(), get2());
  thumb_height = get2();
  thumb_format = LIBRAW_INTERNAL_THUMBNAIL_PPM;
  maximum = 0x3fff;
}
I have to admit, libraw would probably work for loading the raw data itself, but I did not test it. Rawdigger can open them as well. This code snippet from libraw would have been a clue about the file format, but I am silly and did not think of this until literally writing this sentence.
Critically, libraw does not use two very important features of these backs - as part of the capture process, they save a black reference/dark file (and white reference/flat, in the case of the emotion 75LV), and shipped with the backs is (what I believe) a flat calibration file for your specific CCD. Without apply this processing, spoilers, things look not great.
Reverse Engineering Process
I know very little about reverse engineering binary files, but more than nothing! One very simple tool that we can use on any Unix system to tell us what a mystery binary could be is simply the file command.
~/P/00.EMO ❯❯❯ file *.IA
78403E90.IA: doom patch PWAD data containing 3 lumps
doom patch data????? The story is the same for the .BR/.WR files:
~/P/00.EMO ❯❯❯ file *.*R
18ED1AEE.WR: doom patch PWAD data containing 4 lumps
69404E9D.BR: doom patch PWAD data containing 4 lumps
So, because I predate DOOM (very slightly, but literally) I had to search for what this format was, with the hope that someone would know something about it. As I learned, PWAD files are very well documented and fairly straightforward as far as bianry formats go. I found this excellent wiki article detailing the format, and set to work with a jupyter notebook building out functions to read the PWAD files.
First, we need some helper functions to make it quicker to look at different slices of bytes as integers in different byte orders:
gle = lambda b: int.from_bytes(b, byteorder="little")
gli = lambda b, s: int.from_bytes(b[s : s + 4], byteorder="little")
gls = lambda b, s: int.from_bytes(b[s : s + 2], byteorder="little")
gbi = lambda b, s: int.from_bytes(b[s : s + 4], byteorder="big")
gbs = lambda b, s: int.from_bytes(b[s : s + 2], byteorder="big")
As you read before, the PWAD raw file have 3 "lumps" in them. The first four characters of the file simply identify it as an IWAD or PWAD (or they would be some other file signature). Next, comes a 4 byte aka 32 bit little endian number (32b LE) with the number of files in the WAD, and finally another 32b LE integer representing the offset where the file entry data structure starts. The offset for .IA files is...12! After the first 12 bytes we have the file entry structure which is repeated # of files times. The file entry structure is a 32b LE number representing the byte offset in the .IA where the data for this file is held. Next is another 32b LE, which is the size of the file in bytes, followed by an eight byte character array for the name of the file.
We need two functions to read the lumps of the PWAD raw file.
def get_pwad_info(raw):
    ftype = raw[0:4]
    num_file = gle(raw[4:8])
    offset = gle(raw[8:12])
    return ftype, num_file, offset

def read_pwad_lumps(raw):
    lumps = {}
    ftype, num_file, offset = get_pwad_info(raw)
    for i in range(num_file):
        file_entry_start = offset + i * 16
        fe_offset = gle(raw[file_entry_start : file_entry_start + 4])
        fe_size = gle(raw[file_entry_start + 4 : file_entry_start + 8])
        name = raw[file_entry_start + 8 : file_entry_start + 16]
        lumps[name.rstrip(b'\x00').rstrip(b'\xa5')] = (fe_offset, fe_size)
    return lumps
Now we can get the names of each lump in the PWAD raw file, and extract the binary data for each lump. In both the emotion22 and emotion75 raw files, there are 3 lumps: 'META', 'THUMB', and 'RAW0'. From their names, we can easily guess their purpose - the first smaller lump is 512 bytes, and probably contains the metadata for the raw such as the shutter speed and F-stop. THUMB is likely a thumbnail representation of the raw - let's see what we can see!
THUMB PWAD
Let's explore the thumbnail PWAD first:
ia = Path(TEST_FILES / '6C4875A9.IA')
print(f"Reading {ia.name}...")
raw = read_raw(ia)
lumps = read_pwad_lumps(raw)
meta = get_wad(raw, *lumps[b'META'])
thumb = get_wad(raw, *lumps[b'THUMB'])
print(len(thumb))
Which gives us an array of 524288 bytes long. How do we turn this into an image we can display though? We need to make some assumptions:
- Assume 8 bit integers, not 16 (why store extra bits in a thumbnail).
- RGB vs. grayscale, so 3 bytes to represent one pixel.
This gives us a linear image of 524288/3 ~= 174762.6
HMM this seems incorrect! This should probably divide evenly. Maybe the image is padded at the end? Looking at the raw binary data of the THUMB PWAD, this seems possible:

There are many NUL characters (and 0xFF as well further down) - what is the length if we drop those? (524288-15920)/3 = 169456
EXCELLENT! Now, we need a 2d array, not a linear strip of data. Math is hard, so I turned to Wolfram Alpha to give me a list of possible factor pairs for this number:
1x169456 | 2x84728 | 4× 42364
7×24208 | 8× 21182 l
14 x
12104 | 16×10591 | 17×9968 | 28x6052 | 34x 4984 I
56× 3026
2492 | 89x1904 | 112x1513 | 119x1424 | 136x1246 | 178× 952
238 x712 | 272x623 | 356x476 (20 factor pairs)
The greatest common multiple, 356x476 happens to be very close to the emotion 75LV's and the emotion 22's 3:4 aspect ratio (or 4:3, depending on portrait vs. landscape). So let's try loading this into a Pillow image!
Image.frombytes("RGB", (356, 476), thumb[:-15920], "raw")
Which gives us this quite terrible thumbnail:

I am not sure if there is some processing or bad assumptions I made that is causing the image to look so bad, but the thumbnail is not that important anyway. Let's look into the META PWAD!
META PWAD
The metadata PWAD is 480 bytes, and based on the name, I figured it likely contained metadata about the capture such as shutter speed and ISO. Understanding what was in the file from a single sample was a bit tricky:
\x13\x00\xe0\x01\xf4\n\x00\x00\xe8\x00 \x00\x00L\x04\x00				16
L\x04\x00\x00Sinar Hy6\x00\x00\x00				32
\x00\x00\x00\x00\x00\x00\x00\x00\x00\x00\x00\x00\x00\x00\x00\x00				48
\x00\x00\x00\x00\x00\x00\x00\x00\x00\x00\x00\x00\x00\x00\x00\x00				64
\x00\x00\x00\x00\x00\x00\x00\x00\x00\x00\x00\x00\x00\x00\x00\x00				80
\x00\x00\x00\x00\xa8\x0f\xe0\x14\x0e\x00\x00\x00N\x01\xbd\x01				96
\x0e\x04\x03\x03\x04\x00\x01\x00Xc\xe8\x01/002				112
000E8.EMO/1DE646				128
94.BR\x00\x00\x00\x00\x00\x00\x00\x00\x00\x00\x00				144
\x00\x00\x00\x00\x00\x00\x00\x00\x00\x00\x00\x00\x00\x00\x00\x00				160
\x00\x00\x00\x00\x00\x00\x00\x00\x00\x00\x00\x00\x00\x00\x00\x00				176
\x00\x00\x00\x00\x00\x00\x00\x00\x00\x00\x00\x00\x00\x00\x00\x00				192
\x00\x00\x00\x00\x00\x00\x00\x00\x00\x00\x00\x00\x00\x00\x00\x00				208
\x00\x00\x00\x00\x00\x00\x00\x00\x00\x00\x00\x00\x00\x00\x00\x00				224
\x00\x00\x00\x00\x00\x00\x00\x00\x00\x00\x00\x00()\x01\x00				240
\x00\x00\x01\x00\xc5n\x01\x00(\x00\x00\x002\x00\x00\x00				256
\xff<\x83\x91yG\x00\x00\x00\x00\x00\x00\xe1\x02\x08\x00				272
e22-05-0311\x00\x00\x00\x00\x00				288
\x05\x00\x0b\x00\x90\x01\x00\x00g\x01\x0c\x00\x00\x01\x00\x00				304
2\x00\x00\x00\x00\x00\x01\x00\x00\x00\x01\x00\x0f\x8b\x00\x0e				320
\x00\x00\x00\x00\x00\x00\x00\x00\x00\x00\x00\x00\x00\x00\x00\x00				336
\x00\x00\x00\x03\x06\x00\x06\x00\x00H\xe8\x01\x00\x00(\x01				352
\x00\x08\x06\x00\x00\x00\x00\x00\x01\x00\x00\x00\x00\x00\x00\x00				368
\x00\x00\x00\x00\x00\x00\x00\x00\x00\x00\x00\x00\x00\x00\x00\x00				384
\x00\x00\x00\x00\x00\x00\x00\x00\x00\x00\x00\x00\x00\x00\x00\x00				400
\x00\x00\x00\x00\x00\x00\x00\x00\x00\x00\x00\x00\x00\x00\x00\x00				416
\x00\x00\x00\x00\x00\x00\x00\x00\x00\x00\x00\x00\x00\x00\x00\x00				432
\x00\x00\x00\x00\x00\x00\x00\x00\x00\x00\x00\x00\x00\x00\x00\x00				448
\x00\x00\x00\x00\x00\x00\x00\x00\x00\x00\x00\x00\x00\x00\x00\x00				464
\x00\x00\x00\x00\x00\x00\x00\x00\x00\x00\x00\x00\x00\x00\x00\x00				480
We can see a few things about this file right away - such as something that looks like a serial number, and the camera model this RAW was taken with - a Sinar Hy6 (well, the mode the back is setup for at least, technically the camera is a Rollei Hy6 Mod 2/1, the latest version of the Hy6 iterations...). Understanding the rest of the random data is a bit tricky - so I just brute forced it by taking a sequence of shots, holding every parameter constant except one, a sequence for ISO, F-stop, shutter speed, and white balance. Then, comparing the files for each sequence, it was easy to see which numbers changed per shot, making it easy to identify what each sub-byte array in the metadata represented. Some of these are still guesses, such as measured vs. requested shutter time!:
def process_meta(meta: bytes):
    shutter_count = gli(meta, 4)
    camera = meta[20:64].decode("ascii").rstrip("\x00")
    white_balance_name = WhiteBalance(gls(meta, 100))
    shutter_time_us = gli(meta, 104)
    black_ref = meta[108 : 108 + 64].decode("ascii").rstrip("\x00")
    white_ref = meta[172 : 172 + 64].decode("ascii").rstrip("\x00")
    iso = gli(meta, 252)
    serial = meta[272 : 272 + 16].decode("ascii").rstrip("\x00")
    shutter_time_us_2 = gli(meta, 344)
    f_stop = round(gls(meta, 352) / 256, 1)
    focal_length = round(gli(meta, 356) / 1000, 0)
    short_model = serial.split("-")[0]
    model = MODEL_NAME[short_model]
    height, width = MODEL_TO_SIZE[short_model]
    return SinarIA(
        shutter_count=shutter_count,
        camera=camera,
        measured_shutter_us=shutter_time_us,
        req_shutter_us=shutter_time_us_2,
        f_stop=f_stop,
        black_ref=black_ref,
        white_ref=white_ref,
        iso=iso,
        serial=serial,
        meta=meta,
        white_balance_name=white_balance_name,
        focal_length=focal_length,
        model=model,
        height=height,
        width=width,
    )
RAW0 PWAD
The most import PWAD of them all - where the actual raw data is stored. On the emotion22 digital back that I started with, the raw lump was 42837504 bytes long, and 66573312 bytes long for my 75LV. Looking at the initial bytes, it looked most likely that the values of each pixel were stored as 16-bit little endian integers. We have the same problem as the THUMB PWAD - how do we turn this linear array into a 2-dimensional image?
As part of this post I did a lot of research into the Sinar emotion series of backs - I found this awesome presentation by a Sinar engineer, these backs use one of the ill-fated Intel Xscale chips! - but more importantly, I found out the exact model of the sensor they use:
- emotion 22/54/54LV - Dalsa FTF 4052 C
- 48 x 36mm
- 5344 x 4008 pixels
- 9μm (micrometers) pixels
- emotion 75/75LV - Dalsa FTF 5066 C
- 48 x 36mm
- 6668 x 4992 pixels
- 7.2μm pixels
How long would a RAW file be for each back?
5344 * 4008 * 2 (bytes per pixel) = 42837504
6668 * 4992 * 2 (bytes per pixel) = 66573312
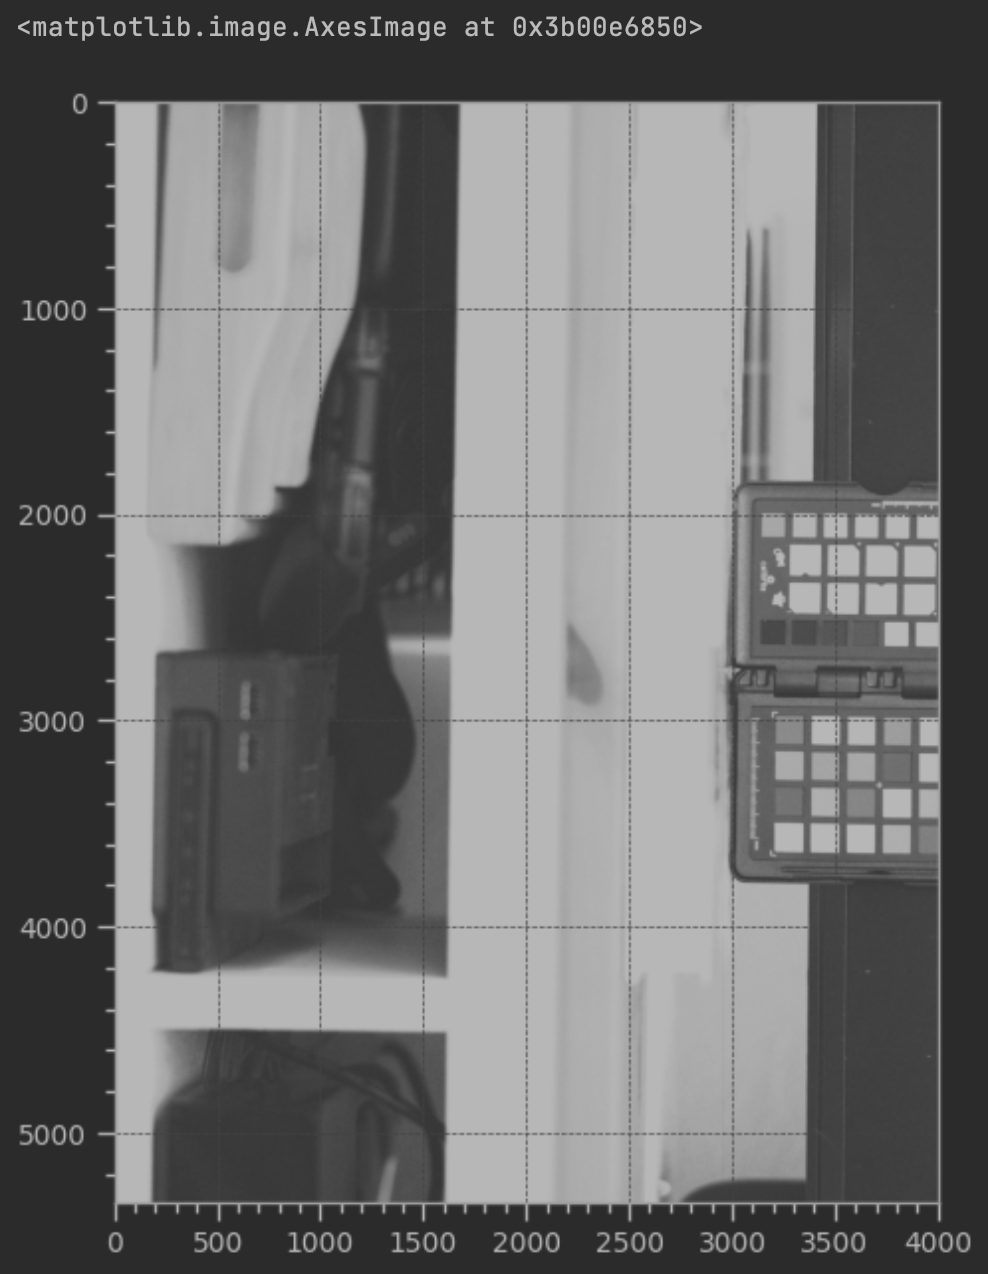
Excellent! The raw is stored without padding, so all we have to do to read the image is load it into a 2D array, in the correct order:
imshow(Image.frombytes("I;16L", (4008, 5344), raw0, "raw"), cmap='Greys')

Why is the image greyscale? As some people reading this may already know, color sensors don't actually see color - they can only register the luminance value. One way to solve this is by placing a set of colored filters over each pixel. These filters are choosen to let through only a specific wavelength range of light, typically corresponding to Red, Green, and Blue, though there are other kinds of filter sets as well. The pattern that many image sensors use is called the bayer pattern, though others exist such as Fuji's X-trans layout.
In order to get a color image, you need to interpolate the other 2 color values for each pixel using the surrounding data - a process called demosaicing. We don't actually need to do this though, all we need to do figure out what pattern we should set for our output DNG file.
In order to configure our DNG file, we need to set the CFAPattern tag. I found a copy of the Dalsa FTF 4052 C datasheet, according to it the color filters are in a RG, GB (RGGB) order from the bottom left corner of the sensor, though this was actually less helpful than you might expect as I just brute-force went through all the other corners first, not knowing where 0,0 was supposed to be...
Now, we have all the parts we need in order to process the raw data and metadata from a Sinar .IA file into a DNG file that we can process with Lightroom or Capture One. A snippet from the processing library:
def write_dng(img: SinarIA, nd_int, output_dir):
    t = DNGTags()
    t.set(Tag.ImageWidth, img.width)
    t.set(Tag.ImageLength, img.height)
    t.set(Tag.Orientation, 8)
    t.set(Tag.PhotometricInterpretation, PhotometricInterpretation.Color_Filter_Array)
    t.set(Tag.SamplesPerPixel, 1)
    t.set(Tag.BitsPerSample, [16])
    t.set(Tag.CFARepeatPatternDim, [2, 2])
    t.set(Tag.CFAPattern, CFAPattern.RGGB)
    t.set(Tag.BlackLevel, [nd_int.min()])
    t.set(Tag.WhiteLevel, [nd_int.max()])
    t.set(Tag.ColorMatrix1, CCM1)
    t.set(Tag.CalibrationIlluminant1, CalibrationIlluminant.Daylight)
    t.set(Tag.AsShotNeutral, [[1, 1], [1, 1], [1, 1]])
    t.set(Tag.Make, img.camera)
    t.set(Tag.Model, img.model)
    t.set(Tag.DNGVersion, DNGVersion.V1_4)
    t.set(Tag.DNGBackwardVersion, DNGVersion.V1_4)
    t.set(Tag.EXIFPhotoBodySerialNumber, img.serial)
    t.set(Tag.CameraSerialNumber, img.serial)
    t.set(Tag.ExposureTime, [(img.measured_shutter_us, 1000000)])
    t.set(Tag.PhotographicSensitivity, [img.iso])
    t.set(Tag.SensitivityType, 3)
    t.set(Tag.FocalLengthIn35mmFilm, [int(img.focal_length * 100), 62])
    t.set(Tag.FocalLength, [(int(img.focal_length), 1)])
    t.set(Tag.UniqueCameraModel, f"{img.model} ({img.serial}) on {img.camera}")
    t.set(Tag.FNumber, [(int(img.f_stop * 100), 100)])
    t.set(Tag.BayerGreenSplit, 0)
    t.set(Tag.Software, f"pyEMDNG v{__VERSION__}")
    t.set(Tag.PreviewColorSpace, PreviewColorSpace.sRGB)
    r = RAW2DNG()
    r.options(t, path="", compress=False)
    filename = output_dir / f"{img.filename.stem}.dng"
    r.convert(nd_int, filename=str(filename.absolute()))
    return filename, r
What about the .BR and .WR files?
Coming in Part 2 :)